Help:Contents-old: Difference between revisions
No edit summary |
No edit summary |
||
| Line 7: | Line 7: | ||
=== Browse with the Timeline === | === Browse with the Timeline === | ||
The timeline is a good starting point for browsing the GHN. The timeline chronologically displays important events in the history of electrical engineering. Each event on the timeline is linked to an article on the same subject. | <p>The timeline is a good starting point for browsing the GHN. The timeline chronologically displays important events in the history of electrical engineering. Each event on the timeline is linked to an article on the same subject. </p> | ||
=== Browse with the Innovation Map === | === Browse with the Innovation Map === | ||
| Line 57: | Line 57: | ||
=== How to Contribute === | === How to Contribute === | ||
<p>[[Image:Contribute.jpg|thumb|right|Contribute a Topic Article box]]Contributors are expected to follow the copyright policies of this site. | <p>[[Image:Contribute.jpg|thumb|right|Contribute a Topic Article box]]Contributors are expected to [[GHN:Policies|follow the copyright policies of this site.]] For further information on our policies, please see the Intellectual Property Issues section of [[GHN:Policies#Intellectual Property Issues|the GHN Policies]]. </p> | ||
<p>Only registered users can create a new page, so be sure that you are logged in before beginning to submit a new article. </p> | <p>Only registered users can create a new page, so be sure that you are logged in before beginning to submit a new article. </p> | ||
Revision as of 19:25, 9 June 2010
For First Time Users
The First-Time User article contains step by step instructions for everything from login to completion of your first article. Please click the above link, and then return to this page for more detailed information.
Browsing and Searching
Browse with the Timeline
The timeline is a good starting point for browsing the GHN. The timeline chronologically displays important events in the history of electrical engineering. Each event on the timeline is linked to an article on the same subject.
Browse with the Innovation Map
Another good place to begin browsing the GHN is the innovation map. The map displays significant locations in the history of electrical engineering. All of the approved Milestones are displayed on the innovation map.
Using the navigation panel in the top left of the screen, you can zoom in and out on the map. Clicking on the directional arrows will navigate the central point of the map in that direction. The map can also be moved by holding down the left mouse button and dragging the mouse in the desired direction. Some locations, such as sparsely populated areas or oceans, cannot be zoomed in fully.
The locations of the milestones are indicated by an orange popup which will display more information when clicked upon. Clicking on the title of the milestone in the resulting white popup box, in this case the link "Milestones: Thomas Alva Edison Historic Site at Menlo Park, 1876", will navigate to the article for that particular milestone.
Browse with Topics
It is a good idea to browse by topic when you only have a general idea of what you are looking for.
When you are in the "Topics" tab, you have the option of browsing by tagged topics. The highest level topics appear in the tan side bar to the left of your screen. Clicking on them will display associated articles. Currently, not every topic contains articles.
You can also browse by the lower-level tags. Use the drop down menus that appear after you click on a topic to view more specific categories of articles.
Browse with "What links here"
You may also find articles of interest by seeing which articles link to the one you are reading. To see this information, choose the "What links here" link while looking at any page. The list of articles which are linked to the specified page is displayed chronologically, the oldest at the top and the most recently linked at the bottom. What links here is found on the left sidebar under "Tools."
Search
If you already have a specific idea of what you want to read, you may want to begin browsing with a search.
When you search for a phrase, the search engine looks for the appearance of ANY of the search terms not ALL of them. Search for exact phrases using "quotes around the phrase."
Page Title Matches and Page Text Matches
When you do a search, the search engine will search for your search terms both in the titles of articles and in the text. If it finds that the search terms are found in both article titles and article text, articles with the terms in the title will be displayed above articles where the search terms appear in the content.
Advanced Search with Namespaces
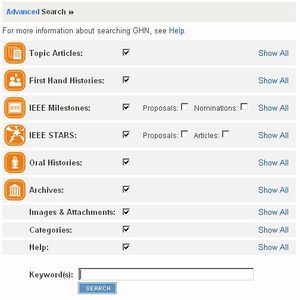
The "Advanced Search" option, found in the top right corner of the page, gives you the option of specifying which namespaces to include in your search.
A namespace is a section of the GHN that contains a certain type of content. For instance,the "First-Hand" namespace contains the personal recollections of engineers. The namespaces in the GHN are "Main," "Media," "Images," "First-Hand," "Milestones," and "Map." You can tell which namespace content is in from its title, which consists of the namespace followed by a colon and the name of the content. If you do not see a namespace in the title of a page, that means that it is part of the "Main" namespace.
Usernames and Logging On
While readers can visit the IEEE site as a guest, IEEE members who want to more actively participate in the GHN should log in using their web account username and password. The login is found in a tan box on the right side of the home page. Additionally, you can reach the login page by clicking on the word "LOGIN" in the header graphic that appears on every page.
Non IEEE members need their accounts approved before they can log in and edit articles. Request a non-member account by emailing ieeeghn@ieee.org
Contributing
How to Contribute
Contributors are expected to follow the copyright policies of this site. For further information on our policies, please see the Intellectual Property Issues section of the GHN Policies.
Only registered users can create a new page, so be sure that you are logged in before beginning to submit a new article.
Pages are put into the namespace that you are in at the time of creation. So before entering your article title, check that the correct namespace tab is highlighted. Create a new page by typing your desired title in the text box on the left hand side of the page and clicking the "New Article" button.
When you first create a page, you will be brought to the new page's edit tab. The GHN automatically creates a template with a section title (the page title is above the edit window and cannot be changed at this point.)
Now that you are ready to enter your article, you can either type directly into the editor or copy & paste text from another source. The tools in the default editor are similar to those that you find in a word processor. Its features are described more fully below. After entering your article, remember to click "Save page" underneath the editor.
First-Hand Histories
An important aspect of the GHN is the First-Hand Histories section, which contains articles written by IEEE members that recall their experiences working as engineers. If you contribute your own First-hand History, only you will able to edit it. However, when writing a First-hand History you must be careful not to write a history or something that would better suited as a “topic article.” A First-hand History is the recollection of an event, as seen through your eyes, as a first-hand witness to history. It records the direct experience of the event.
Creating a First-hand History is similar to creating any other article. First click on the "First-Hand Histories" tab. Then type the title of your history into the contribute text box in the left sidebar "New First-Hand History." You will be brought to the screen that gives you space to enter your article. Be sure to click the "Save page" button at the bottom of the screen.
Topic Articles
If you have material for a new topic article, you should first perform a search to be sure that a very similar article does not already exist. If after searching you see that your article will be a useful addition, create a topic article. From the topics page, type the name of the article that you wish to create into the text box on the left of the screen and click "New Article." Then enter your article on the edit tab. Click "Save page" at the bottom of the screen to publish your page. Remember to categorize your article to help others find it.
Writing and Editing Modes
The GHN allows contributors to use two different modes, WYSIWYG and Wikitext. Once in the edit tab, you can toggle between these views using the first icon on the left of the edit window.(see screencap below)
WYSIWYG
The default option for entering articles and editing in the GHN is a What You See Is What You Get (WYSIWYG) editor. The editor displays your input, just as it will appear when published.
Features of the WYSISYG edit bar
| Top left to right | Bottom left to right |
|
|
Wikitext
If you are familiar with or feel ambitious enough to learn to use wikitext, you can edit articles using it. Learn more about wikitext by reading Meta-Wiki's guide to wikitext, here.
Previewing & Saving
Always remember to click "Save page" before navigating away from the edit tab so your work is not lost. Every time that you click "Save page" on the edit page, you create a history of your actions in the "History" tab and your work gets published to the GHN. On the other hand, if you click "Show preview" the changes are not stored and do not get added to the history. After clicking "Show preview" you will be brought to a page that displays your changes applied to the article at the top of the page and the text editor box below that. If you are happy with the preview results, then you can click "Save Page" and your changes will be applied to the article.</p>
Adding Headings and Subheadings
Headings are used to organize the content within an article. To add headings, type in the text of your heading at the relevent place in your article. Then use the drop down menu next to the word "Format" at the top of the WYSIWYG editor to change the appearence of that text. You will see the choices "Normal" and Heading 1-6. If you include more than three headings in your article, a table of contents will automatically be generated by the GHN.
In general, you should not use "Heading 1," because it is only meant to be used for the title of an article.
If you use the WYSIWYG editor to make write an article, you may notice that when you try to create headings the entire paragraph gets formatted as a heading. Include an extra hard return after each header, to prevent this.
Headings are formatted in wikitext using the equals sign ( = ) and a space. Heading 1 is enclosed in = one equal sign. = Heading two is enclosed in == two equal signs, == etc.
Creating Links in Articles
Internal Links
Links to other pages in the GHN are called internal links. To create an internal link, highlight the words or words you wish to have act as link and click the link icon at the top of the WYSIWYG editor. In the link box begin typing a word from the title of the article that you wish to link to and the search will automatically generate a list of pages in the GHN. Select the title of the page you wish to link to and click "OK."
External Links
External links are created in the same way as internal links, except instead of searching for the page you are trying to link to, you must enter the entire URL of the external website. The automatic search will recognize that you are linking to an external page and will not show any results in the search.
Using Media
Upload an Image
Before uploading a file, be sure to save your page. Clicking on "Upload a file" navigates you away from the edit window and you will lose your work if you neglect to save it. To upload an image, go the "Upload file" link in the left sidebar. You will be brought to a new page that allows you to browse your computer's hard disk for an image that you want to add to the GHN. After selecting the image, you can choose the name that it will appear under on the GHN or you can choose to leave the same filename that it had on your drive.
When you upload an image, the GHN automatically creates a page for it under "Images:Your_file_name." You can use the edit tab on this page to include information about the image, such as when it was created and copyright information. The text that is entered in the edit tab of an image page is displayed under the image.
The GHN currently supports png, gif, jpg, and jpeg images.
Embed an Image
After your image is uploaded, return to the article’s edit tab and click the “Insert/Edit Image” icon in the WYSIWYG editor. Type the first few letters of the name of the image you uploaded. This will display a list of similarly named images. Find the correct one and click to highlight it. Add a caption and choose “Special type.” Choose thumbnail for larger images. You can then align the image right, center, or left. Click “OK” and the image will be inserted in your document. Do not worry if you cannot see the caption in the editor, it will be displayed on the published page. Click “Save page” and you have successfully embedded an image in your article.
Upload Other Media
In addition to images, the GHN also supports doc, pdf, ppt, xls, flv, swf, and mp3 files. These are added to the GHN in the same way as images.
Embed a Flash Movie
You can embed flash movies in your article. Upload the video to the GHN using the same upload menu that you use to upload pictures. Then enter the URL of the video. Highlight the URL and click the special tag button on the WYSIWYG editor (<s>). Select the proper tag and click okay. You will no longer see the URL of the video; it will be replaced by the word "special" highlighted in yellow.
Categories and Categorizing
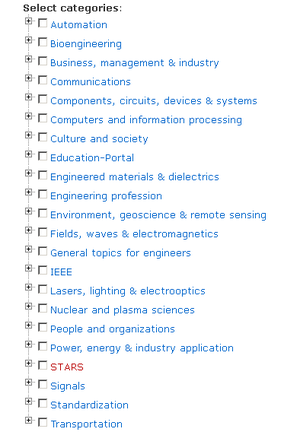
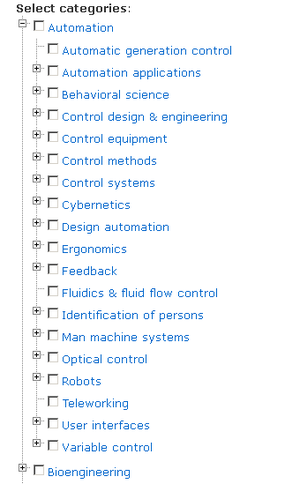
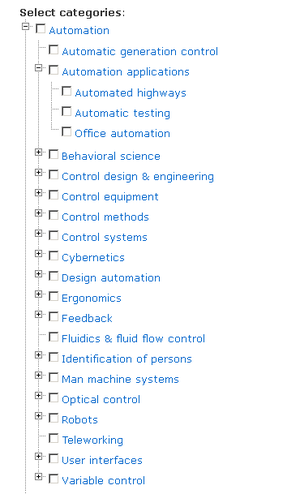
After contributing an article to the GHN, it is important to categorize it, so visitors to the site can easily find and read it. The process of categorization traditionally used in wikis tends to produce a flat classification of content that does not make it easy to browse by broad headings. Furthermore, because users do not have meaningful access to the existing categories, they introduce many variations of the same terms. As a result, browsing by categories tends to be no better than searching by words. The IEEE GHN has introduced a new tagging interface to the traditional wiki. This categorization interface contains pre-existing hierarchical lists of categories and subcategories that the user can easily access through pull down menus. These easily accessible hierarchical lists make it easier for users to place any entry in the IEEE GHN into a suitable category. Although not completely exhaustive, the categories and subcategories are fairly inclusive of most of the contents that will be contributed to the IEEE GHN. In time, these lists will be expanded if a clear need arises. Before categorizing an entry, please take the time explore the lists and sublists.
To categorize your article, use the drop down menu below the edit window. When you choose a category from the first menu, a second menu will appear that allows a more specific category to be chosen. Then a third menu will appear, allowing you to choose an even narrower category. Feel free to add as many categories as you see fit in order to increase the chance that your article will be found and read.
To undo a particular selection, use the drop down menu and choose "Select..." this will clear that category and of the lower-level categories associated with it.
You can approach tagging an article in two ways. The first method involves selecting all the the higher level categories that you want first, by clicking "Add another category." After selecting all of the upper level categories that you want, go back and choose the lower level topics for each upper level you selected. Alternatively, you can work by choosing one upper level and all other the subcategories that go with it and then clicking "Add another category" and repeating the process.
You can tell how published articles are tagged by looking at the bottom of that article's page. Higher-level categories appear in red and lower-level categories appear in blue.
Editing
Why Edit
Quite a few people get started editting because they are reading an article and they notice an omission, a factual error, or a typo. If you find yourself in this situation and know how to make edits and changes, go ahead and do so. If your change is more than minor, please include references, because all unreferenced material is subject to being removed.
However, there may also be times when it would be better to create a new topic article than edit an existing article. You might consider creating a new topic article if you have significant amounts of material to add to an existing article or if you feel a tangent in the article deserves further exploration.
How to Edit
The first step in editing any page is clicking on the edit tab. The edit tab is in a blue box with white text, right above the article. A new page will load and "Edit" will now be highlighted in white. The edit page consists of an edit window with the existing text, categorization drop-down menus, an edit summary text box, and 3 buttons labeled "Save page," "Show preview," and "Show changes." The features of the WYSIWYG editor are described above. As you enter changes, save your page using the "Save page" button often!
Summary Text Box
If you edit a pre-existing article it is courteous to leave a summary of the changes that you make in this box. Put a check mark in the "This is a minor edit" box, if you are only making a small change, such as correcting a typo.
Renaming Pages
Because the articles in the GHN use many internal links, pages cannot be renamed in the same way that you rename files on your computer. Instead of renaming a page, use the "Move" tab. Moving an article allows you to give the article a new title and at the same time ensures that all links pointing to the old article still function.
Discussion threads
Every article in the IEEE GHN allows for discussion threads. The purpose of the discussion threads is to provide a space where all members of IEEE can share their comments on the article. The comments can range from simple editorial suggestions to substantive suggestions regarding an article's content.
Unlike other wiki's, the IEEE GHN allows for the discussions to be displayed as common threads. As a result, organized discussions can evolve around many specific issues. Everyone is also free to respond to anyone's comments. To start a discussion thread or participate in an existing one, just click on the "Discussion" tab.
Rating pages
Pages on the GHN can be rated on a 5-star system in 3 categories:
- well written
- informative
- accurate
Each of these ratings has to be done separately.
The ratings will help us monitor the quality of the IEEE GHN's content. In addition to discussion threads, the ratings are a system of informal peer review. We thus encourage you to rate any content that you read.
Ratings are the only way the general public can, at the present time, interact with the IEEE GHN. One of the prime missions of the IEEE GHN is to reach out to the public at large. In addition to measuring the number of visitors, ratings will give us barometer of how well the site is received by the general public.
Notes & Tips
- When writing an article, before adding an image, click "Save Page." You will need to leave the edit screen before up loading an image, so your changes will be lost if you neglect to do this.
- To link to non-image media (PDFs, DOCs, etc.) add the media the same way you add an image, but go into the wiki text and change "Image" to "Media" otherwise the wiki will try to display a thumbnail of an image that does not exist.
- When you paste in Mozilla Firefox a new window will open for you to paste into. Just paste into the new window and click "OK." Your text will appear where the cursor was.
- Increase visibility by holding down control and simultaneously pressing the + sign. Hold down control and hit the number 0 to return to regular size.
Account settings
Account settings can be viewed from the home tab in the upper right hand corner. These settings allow you to modify the pages that control your communication with other users, your preferences, your watchlist, monitoring your contribution articles, and will allow you to log out of the Global History Network.


